Pixar Events (Door / Bar)
Are you sick of these decks that brainstorm twice every turn, generate infinite resources, mill out and then sit on their compression without any consequences? Have you ever wished that maybe Weiss Schwarz is a bit more interactive, maybe allow you to bully your opponent a little and make them pay for being greedy? Lucky for you, with this event focused Pixar deck you can have all that fun while also brainstorming every turn, milling out every turn, and sitting on an obscene amount of resources.
Usually events are tricky to play with because there are few ways to get them into hand. Most decks rely on drawing into their events or use combos that add a specific event. Thankfully, the Toy Story 30th Anniversary set offers more ways to dig for them along with a bunch of new exciting events to play with.
Overview
(click on images to get redirected to the official card page)
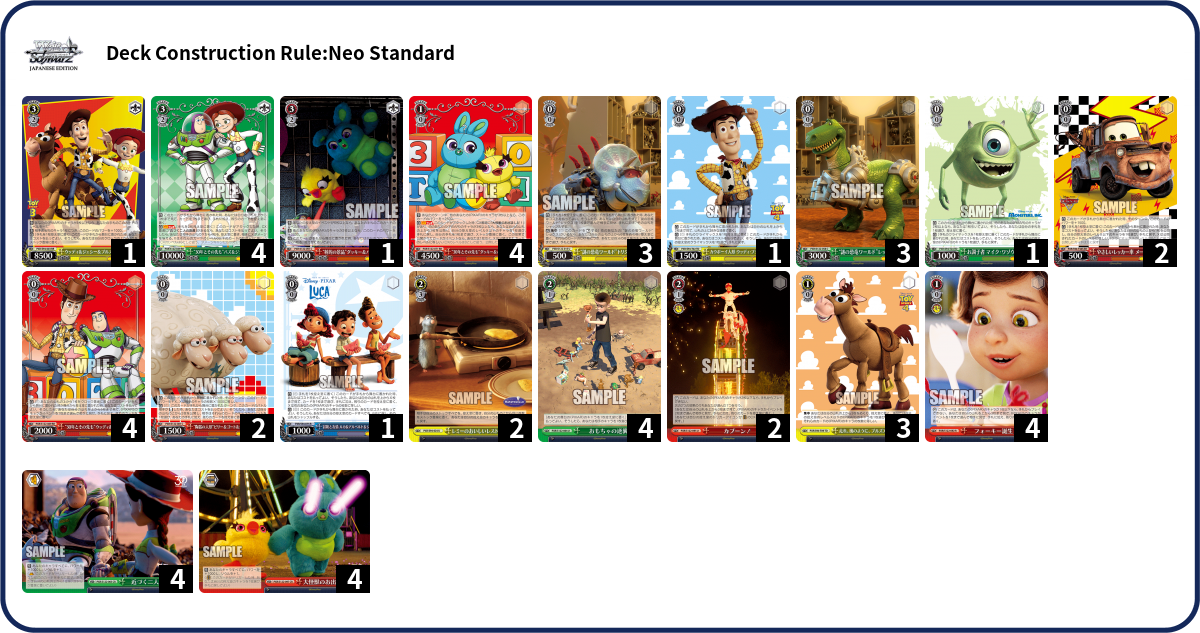
The Lv1 Combo - Ducky and Bunny
 (RR) 1/0 Ducky & Bunny (PIXAR)
CONT - During your turn, if you have 3 or more other <PIXAR> characters, this gets +2500 power.
AUTO - {CX Combo} When this attacks, if you have the Door CX (097) in your CX Area, and you have 3 or more other <PIXAR> characters, reveal the top card of your deck, then choose 1 Level X or lower character from your Waiting Room, and add it to hand, then choose up to 1 card in your hand, send it to Stock. If the revealed card is an Event, draw 1 card. X equals the Level of the revealed card.
4x | This is the star of the deck and what everything is built around. Ducky & Bunny combo is a conditional plus 2 to hand that also lets us convert hand into stock, allowing us to generate up to 6 stock per turn. Generally, in Weiss Schwarz, generating 3 stock a turn is the baseline, so being able to gain more stock without having to swing with a different card like a stock-charge profile is a huge bonus. The catch to fully utilizing this insane advantage combo is having to play a lot of events, which is a deck-building restriction. It also requires 3 or more other characters so make sure to not miss that.
While level 1 combos that plus 2 is nothing new (such as Chloe, or more recently Saki and Modernia) there is a surprising amount of flexibility in being able to choose between gaining more stock or hand. We can also choose what goes into stock and where it goes, which is very useful in the hands of a talented player. A common drawback of these types of combos is poor card selection as we are only expecting to salvage level 0s. However, since there aren’t any other level 1 or level 2 characters in the deck this drawback is not as noticeable. Another common issue is that the combo offers no mill on its own, but you’ll find that this won’t be a problem after seeing the rest of the deck.
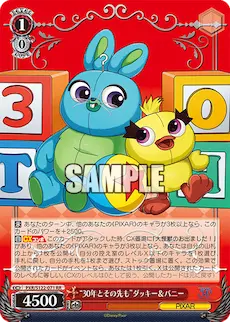
The Brainstorm
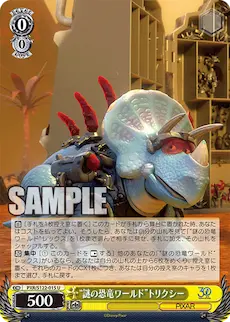
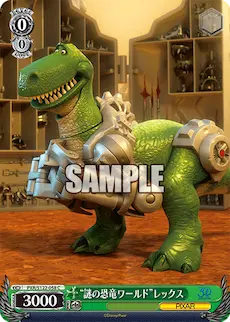
(U) 0/0 Trixie (PIXAR)
AUTO - [Discard 1 card] When this is placed on stage from hand, you may pay cost. If you do, search your deck for up to 1 {Vanilla 0/0 Rex - 058}, show it to your opponent, add it to hand, and shuffle your deck afterwards.
ACT - BRAINSTORM [(1) Rest this] If you have another {Vanilla 0/0 Rex - 058}, flip over the top 6 cards of your deck, then send them to Waiting Room. For each CX among them, choose up to 1 character from your Waiting Room, and add it to hand.
3x, 3x | What is better than brainstorm 4? Brainstorm 5. What is better than brainstorm 5? Tap-self brainstorm 6, salvage per generic CX hit. We’ve seen the rise of tap-self brainstorm 5 recently, however, they are often locked to hitting specific CXs. For us, the demerit is that the vanilla T-rex has to be on the field in order to perform the brainstorm.
Brainstorm 6 is incredibly broken. Compared to the standard brainstorm 4, one stock can convert to 50% more resources, 50% more mill, and ~30% higher chance on actually hitting brainstorm so that we won’t be sad and broke and lonely. As such, brainstorming 6 every turn is what we will be using our abundance of stock on in order to loop the level 1 combo. Any additional hand from brainstorming will, in turn, be converted to stock to form a vicious cycle of card advantage. By the way, the Trixie brainstorm also bonds to the vanilla T-rex, letting us fetch it from deck to always meet the brainstorm condition. This effect also doubles as a ditch-out or hand filter for an early body, as a cherry on top.
The Events
As mentioned earlier, this deck needs to play a lot of events so that we can take advantage of the Ducky & Bunny combo. In total my build plays 15 events which feels like a sweet-spot (~30% hitrate on deck one), but feel free to play more or less depending on how greedy you are. It’s worth noting that the chance to reveal an event increases over the course of the game as more 0s are thrown into stock.
 (R) 1/0 Event
COUNTER - If you have 1 or less <PIXAR> characters, this cannot be played from hand. Look at up to 3 cards from the top of your deck, choose up to 1 <PIXAR> character or an Event from among them, show it to your opponent, add it to hand, send the rest to Waiting Room.
 (TD) 1/0 Event
BRAINSTORM - Flip over the top 3 cards of your deck, then send them to Waiting Room. Choose up to 1 Level X or lower <PIXAR> character from your Waiting Room, add it to hand. X equals the number of <PIXAR> characters sent to Waiting Room by this effect.
4x | Forky is a Torch profile that can also add events, however it can only check 3 cards instead as a demerit.
3x | Bullseye is a Tornado profile which makes it very easy to loop combo or add 0s. While we do play a lot of events, the chance of not milling any character is only ~12%.
Overall, deckspeed good.
 (U) 2/1 Event
COUNTER - If you have 2 or less <PIXAR> characters, this cannot be played from hand.
Choose 1 of the following 2 effects and resolve it,
a) “Look at up to 3 cards from the top of your deck, choose up to 2 <PIXAR> characters or Events from among them, show them to your opponent, add them to hand, send the rest to Waiting Room.”
b) “Choose 1 CX with a Door Trigger in your Waiting Room, add it to hand.”
2x | Slamming a CX every turn is how we keep generating an unfair amount of resources, and this event helps enable that. It also functions as an emergency mill or stock-out, and it can add events to hand.
 (U) 2/1 Event
[Send 1 of your <PIXAR> characters on stage to Waiting Room] You may pay cost. If you do, choose 1 of your opponent’s characters, send it to Memory.
4x | I love it when cards are flavorful in Weiss, I also especially love it when I’m bullying my opponent and making sure that they can’t play with their toys. With this event all of their brainstorms and powerful backrows are going to memory. Early plays and standbys? In memory. Uninteractive finishers like these cool anti-burns or giant bodies for tap counters? Goodbye.
“But it’s so expensive - 2 hand and 1 stock can’t be worth it”
Luckily, this deck generates up to 6 stock and 3 hand a turn, plus whatever the brainstorm 6 hits. While other decks prefer to save resources for an explosive finisher, spam heal early, or on the rare occasion go all out at lv2, this deck instead makes the rest of the game miserable for the opponent. A nice plus is that we can sacrifice our utility 0s as cost if they’re going to be played over with the level one combo anyways.
 (U) 2/3 Event
Your opponent sends all of their Stock to Waiting Room, then puts an equal number of cards from the top of their deck into Stock. Choose up to 1 character in your Waiting Room, add it to hand.
2x | Last but not least, having access to stockswap before level 3 is always a treat. Yes it’s not buns but a stockswap must always be respected, especially when we generate enough stock to easily afford it. The bonus of salvage on play makes it hand-neutral and can grab a finisher when going for game or loop the advantage combo at level 2. This deck plays the yellow event from the previous set, but the same profile also got reprinted in red. Playing the yellow event here is important since we need the color for our level 1 tornado event.
“Anyone can cook!”
The Finisher - Buzz & Jessie
 (RR) 3/2 Buzz & Jessie (PIXAR)
AUTO - When this is placed on stage from hand, look at up to 3 cards from the top of your deck, choose up to 1 card among them, add it to hand, and send the rest to Waiting Room.
AUTO - {CX Combo} [Discard 2 cards] When this attacks, if you have the Bar CX (065) in your CX Area, you may pay cost. If you do, send the bottom 4 cards of your opponent’s deck to Waiting Room, then deal X damage to your opponent. X equals the number of Level 0 or lower cards sent to Waiting Room by this effect +2.
4x | Instead of going for an explosive finisher, I’ve found that something more consistent and easy to set up is best for this deck. At first glance Buzz & Jessie isn’t very exciting, but upon a closer look it comes with many perks. The on-play effect means that we’ll always find our CX or enable us to dig for another finisher or grab an event (such as stockswap or bully event), all while going hand neutral to offset the combo cost. To be honest, I initially picked this finisher because it’s a Bar trigger and because I needed green for the bully event, but I’ve come to really appreciate the consistency it provides.
Icytail-type finishers are famous for being able to ignore the opponent’s compression. Interestingly, Buzz & Jessie is a unique in that it guarantees at least a burn 2 despite being an icytail finisher so we will always have reach even if no CXs are milled, such as against a stockswapped deck with few CXs. Performing a stockswap → triple-finisher does cost 9 stock but remember that we can generate 6 stock a turn with few drawbacks. Overall, Buzz & Jessie just a flexible and efficient finisher that works well into any deckstate.
The Lv0s
 (RR) 0/0 Woody & Buzz (PIXAR)
AUTO - [(1) Put the top card of your deck into Clock] When this is placed on stage from hand or sent from Stage to Waiting Room, you may pay cost. If you do, look at up to 5 cards from the top of your deck, choose up to 1 <PIXAR> character or an Event from among them, show it to your opponent, add it to hand, send the rest to Waiting Room.
4x | One of the most amazing Riki profile so far; there are two separate trigger timings and this card can mill up to 12 cards on its own. We can also add events off the effect. Incredible design by Bushiroad.
 (C) 0/0 Billy & Goat & Gruff (PIXAR)
AUTO - When this is placed on stage from hand, this turn, this gets +X power. X equals the number of your opponent’s characters times 1000.
AUTO - (1) During the turn this was placed on stage from hand, when this card’s battle opponent is Reversed, you may pay cost. If you do, reveal the top 2 cards of your deck. Your opponent choose 1 character or Event from among them, you add it to hand, and send the rest to Waiting Room.
2x | Sheep is a solid beater that also provides some hand advantage and milling. Our sheep can grow quite large, allowing us to run over most level 1 combos if we can’t field triple combo ourselves.
 (TD) 0/0 Mater (PIXAR)
AUTO - When this is placed on stage from hand, this turn, this gets +1500 power.
AUTO - [Discard 1 card] When this is placed on stage from hand, you may pay cost. If you do, reveal the top card of your deck, then choose 1 Level X or lower character from your Waiting Room, and add it to hand. X equals the Level of the revealed card.
 (TD) 0/0 Mike (PIXAR)
AUTO - When this is placed on stage from hand, if you have 2 or more other <PIXAR> characters, you may draw 1 card. If you do, discard 1 card.
AUTO - [Discard 1 Climax] When this is placed on stage from hand, you may pay cost. If you do, choose 1 <PIXAR> character from your Waiting Room, and add it to hand.
2x | Mater is a beloved Riko profile, mainly used to loop brainstorms or filter for level 0s. Our chances of revealing a level 1 is roughly 50/50 in this deck, so it is also a decent way to loop combo if your brainstorm misses.
1x | Mike Wazowski is a very nice double filter that also offers some draw. We will be triggering Bars so having the ability to grab a specific character from the waiting room will often come up. I always like to salvage this off combo if able as it provides good selection on the next turn.
 (TD) 0/0 Woody (PIXAR)
AUTO - When this is placed on stage from hand, look at up to 2 cards from the top of your deck, and put them back on top in any order.
AUTO - [(1) Discard 1 Climax] When this is placed on stage from hand, you may pay cost. If you do, choose 1 Climax from your Waiting Room, and add it to hand.
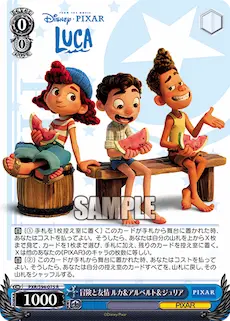 (R) 0/0 Luca & Alberto & Giulia (PIXAR)
AUTO - [(1) Discard 1 card] When this is placed on stage from hand, you may pay cost. If you do, look at up to X cards from the top of your deck, choose up to 1 card from among them, add it to hand, and send the rest to Waiting Room. X equals the number of your other <PIXAR> characters.
AUTO - (2) When this is placed on stage from hand, you may pay cost. If you do, shuffle all cards from your Waiting Room into your deck.
1x | Woody is just a basic CX swap. As a bonus, the second ability to check 2 rearrange can set up hits for our level 1 combo or decide between brainstorming vs milling with an event.
1x | Luca allows us to dig for a Door because slamming a CX every turn is how you win in Weiss. The ability to pay 2 to free-fresh will very rarely come up since our level 1 combo requires a waiting room, but if you’re really in a pickle it is there.
The Early-Plays
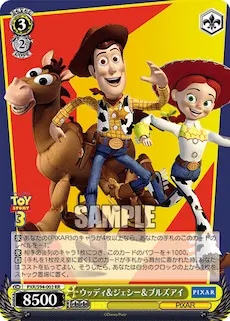 (RR) 3/2 Woody & Jessie & Bullseye (PIXAR)
CONT - If you have 4 or more <PIXAR> characters, this gets -1 Level in hand.
CONT - For each of your opponent’s Back Row characters, this gets +1000 power.
AUTO - [Discard 1 card] When this is placed on stage from hand, you may pay cost. If you do, put the top card of your Clock into Stock.
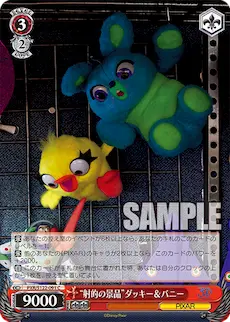 (C) 3/2 Ducky & Bunny (PIXAR)
CONT - If you have 6 or more Events in your Waiting Room, this gets -1 Level in hand. CONT - If you have 2 or more other <PIXAR> characters, this gets +2000 power.
AUTO - When this is placed on stage from hand, you may Heal 1.
1x, 1x | There are only basic early-play healers as our options here. Woody & Friends is easier to use but sometimes it can be hard to have the color condition. Ducky & Bunny is on red so we won’t miss color, but its ep condition of needing 6 events can be tricky to have.
It may not be immediately obvious but it is rather difficult to sculpt these to hand. We can’t grab them reliably with the level 1 combo and unfortunately Pixar does not have access to a helmet profile, so our best option is hitting brainstorm or triggering a Door. As a result, spamming heal at level 2 is quite difficult so please keep that in mind if you’re going for that gameplan!
And that is all the cards for the deck!
In Summary
This event-focused Pixar deck relies heavily on the level 1 combo to generate an excess amount of stock while also being able to maintain hand. This surplus of stock is the fuel for our brainstorm 6 which, in turn, will convert to even more resources along with some deckspeed as a bonus. Our level 1 events make it a breeze to loop combo without costing stock while also offering some more deckspeed. In addition, the flexibility of our Riki timing means that we can always tri-lane going second and still guarantee playables with a low 0s count - this effect doubles as more deckspeed too! Thanks to all of this deckspeed, we can mill out very quickly despite playing a greedy advantage combo. This can make our deck 2 very compressed because we are able to squeeze out more resources while still decking out at the same pace as a typical mill combo.
There may be a few hiccups when piloting the deck for the first time due to its three-color setup, and the high speed at which you are going through the deck can occasionally lead to awkward situations. However, in the midgame, the extra resources that we’ve worked hard to accumulate can be traded to remove important pieces from your opponent’s board or be converted into even more resources. While our finisher isn’t the star of the show, it offers reliability and synergizes with an event-heavy deck well. Just like a certain Aki finisher, Buzz & Jessie can flip the game from low-to-mid level 2 for some good ol’ Weiss Schwarz fun - killing from level 3 though… I’m not so sure.
That is all I would like to share here about the deck. There are some intricacies and quirks, but I’ll save that yap for now - you can probably figure them out as you play. I highly recommend everyone to give this deck a try!
Below are some pros and cons, followed by a quick Q&A section.
Pros
✅ +6 stock a turn
✅ Brainstorm 6 go brr
✅ Amazing deckspeed
✅ Permanent backrow/bodies removal
✅ Stockswap at level 2
✅ Scam finisher
✅ Bully your opponent
Cons
❌ Poor early-play heal usage and options
❌ Plays a three-color setup
❌ Might be homeless if brainstorm misses
❌ Will definitely be homeless if opponent is playing Kaiju No.8
❌ Too many game actions
❌ Finisher might not kill
❌ Illegal set
❌ Locals might hate you (caution is advised if you don’t have a resident TRV player to offset their frustrations)
Q&A
How often should I stock?
I always try to stock with the first combo because it’s a clean stock that won’t be touched, sheep and riki are good targets here. Otherwise, be liberal with stocking if you’re getting a draw off top-check. While I’m often happy ending the first combo turn with 4 hand if they’re quality cards, I recommend keeping at least 5 cards in hand on later turns so that you can always go for triple if needed, or forgo “clock draw two” since we plus so much already.
If you trigger a CX on the first swing then stop stocking so that you have the chance to pay it out. However, at level 2 it can sit 4 stock deep if you’re planning to play any of the level 2 events or an early-play heal.
What should I salvage off the level 1 combo?
My priority is often mike/cx-swap → luca-cantrip → riki, that is how I usually want them in hand. For the first swing I will always salvage a riki or sheep to put into stock. Then, for the last swing I will put any extra utility 0s into stock so that they’ll be in the waiting room for my next turn. For example, Luca would go into stock if I triggered a Bar, or cx-swap would go into stock if I drew the 2/1 event that salvages a Door.
Playing three colors is difficult, what color should I level?
If I’m given the option I like to level yellow → green → red. Of course always make sure to have red starting from level 1, but often enough I can clock it from hand or have it taken as damage while the other colors are more difficult to get. Pro-tip is to salvage the color needed for the next level in order to clock it for turn.
What if two of my level 1 combo are in clock?
Sometimes unlucky, but if unlucky too often then consider playing the double clockswap to hand-fix instead.
Why don’t you play the new Bo & Woody finisher?
That is a finisher worth considering. I went with Buzz & Jessie because I needed enough green for the bully event and Bar is a great trigger to have. Playing a healing finisher does come with the advantage that you’re more likely to live for another turn, especially since we can be extremely compressed. Bo & Woody is also one the cheaper CocoaChino profile we’ve seen, this effect is more consistent at closing out games from level 3. In comparison, Buzz & Jessy is more consistent to execute thanks to the check 3 on-play effect, while overall being a little cheaper in cost. As discussed above, it is also a finisher that kinda just works into any deckstate and synergizes very well with the stockswap event. Finally, there is nothing I hate more in Weiss Schwarz than fielding triple-finisher and not having the right CX in hand, Buzz & Jessy guarantees that my chances of that is close to none.
A big incentive of playing 8 Door is being able to make use of the Forky brainstorm in order to salvage specific events to hand. However, I feel that brainstorm 6 is too great of a perk to give up. Most of our events simply facilitate looping the level 1 combo so they are not a necessity, and to make up for this Buzz & Jessie can dig for a specific event at critical moments. The best event to salvage would be the red 2/1 that salvages a gate, but I’m willing to give that up. If you want to see a specific event regularly I’d argue to just play more copies of it instead! Nonetheless, everyone has different playstyles and I do think that Bo & Woody is a decent option, so feel free to swap out the finisher to experiment - and remember to up your green ratio elsewhere.
Can I play more events?
Sure, there are still many strong options such as the level 1 Riko event or a 1/1 bounce-self/salvage event to supplement the deck. I’ve personally tested a version with 18 events but at a certain point it feels like overkill, especially considering that we still need level 0 characters in the waiting room to salvage with the combo.
I’m missing my brainstorms please help.
Git gud. Don’t be afraid to salvage a spare copy to have the option to double brainstorm next turn. In fact, you’ll find yourself doing that a lot. The extra brainstorm can also be used as sac cost for the bully event at level 2. Riko is a good way to loop brainstorm as well if you have the spare hand to use. If all else fails, I’m happy taking those cancels in my compressed deck too ^^

“brainstorm is the fundamentals of weiss”
Credits
All english translations text is credited to the WeissTeaTime team
All images are taken from the official WS-TCG card page